Hayward Vari-Flo XL Valve Manual: A Comprehensive Guide
This manual provides detailed instructions for the Hayward Vari-Flo XL valve, covering installation, operation, maintenance, and troubleshooting of your pool’s filtration system.
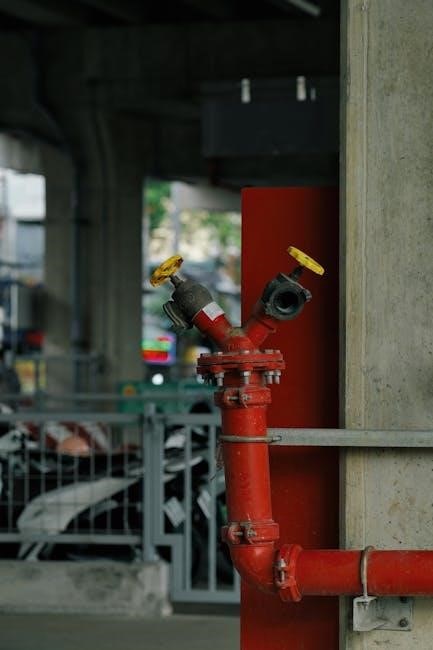
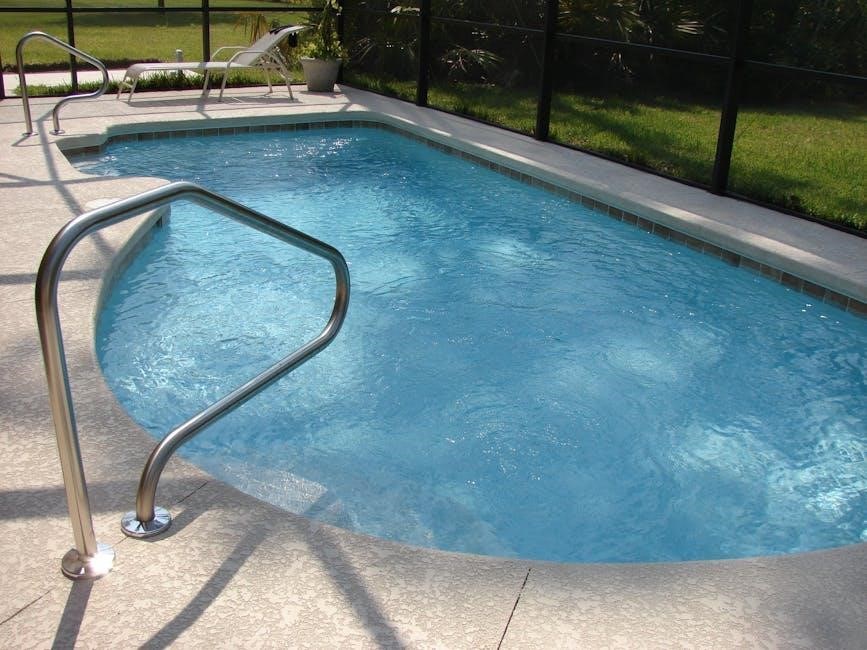
The Hayward Vari-Flo XL valve is a cornerstone component in many pool filtration systems, renowned for its durability and versatile functionality. This top-mount multiport valve, often found in SP0714T series models, efficiently manages water flow for filtration, backwashing, rinsing, waste removal, and recirculation.
Understanding its operation is crucial for maintaining optimal pool water quality and extending the life of your filtration equipment. This guide will delve into the valve’s construction, components, and proper usage. Genuine OEM Hayward replacement parts, like the filter to tank o-ring and clamp assembly, are readily available to ensure continued performance. Proper installation and adherence to safety precautions are paramount for a trouble-free experience.
Understanding the Valve’s Function in Pool Filtration
The Hayward Vari-Flo XL valve acts as the central control hub for your pool’s filtration process. It directs water flow through various pathways, enabling essential functions like filtering debris, cleaning the filter media via backwashing, and efficiently rinsing the system.
During normal operation (Filter mode), water passes through the filter, removing impurities. Backwash mode reverses the flow, expelling accumulated dirt and grime. Rinse mode resettles the filter media post-backwash. Waste mode bypasses the filter for quick draining, while Recirculate mode provides direct water circulation. Maintaining proper water chemistry is vital for valve compatibility and longevity, ensuring optimal filtration performance and a sparkling clean pool.

Valve Components and Identification
The Vari-Flo XL valve comprises a valve body, handle assembly, internal parts like diaphragms and o-rings, and a crucial pressure gauge for monitoring performance.
Valve Body and Construction Materials
The Hayward Vari-Flo XL valve body is a critical component, engineered for durability and resistance to pool chemicals. Typically constructed from robust thermoplastic materials, it withstands prolonged exposure to chlorinated water, UV rays, and varying temperatures. This material choice minimizes corrosion and ensures a long service life.
The valve body incorporates integrated ports for connecting to the filter tank and plumbing lines, facilitating a secure and leak-proof system. Some models feature a sight glass and gasket, allowing for visual inspection of internal flow. The design prioritizes ease of installation and maintenance, with standardized threading for compatibility with common pool equipment. Genuine OEM parts, like those available at PoolZoom.com, guarantee a proper fit and optimal performance of the valve body.
Handle Assembly and Operation
The handle assembly of the Hayward Vari-Flo XL valve controls the internal valve positioning, directing water flow for various filtration functions. Operation is straightforward: rotating the handle selects between filter, backwash, rinse, waste, and recirculate modes. A secure locking mechanism prevents accidental shifts during operation.
Smooth handle movement indicates proper function; stiffness may suggest debris or worn internal parts. Regular inspection of the handle assembly, including screws and nuts (available in sets from suppliers like Pool Supplies), ensures continued reliable operation. Proper handle positioning is crucial for effective pool maintenance, allowing users to easily manage their filtration system.
Internal Parts: Diaphragm, Seals, and O-Rings
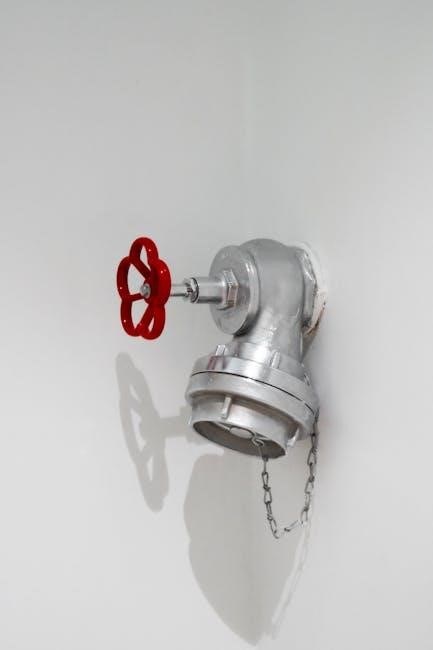
The Hayward Vari-Flo XL valve relies on critical internal components – the diaphragm, seals, and O-rings – to maintain watertight integrity and proper function. The diaphragm directs water flow based on handle position. Seals prevent leakage between valve sections, while O-rings, such as the filter to tank O-ring, create crucial seals at connection points.
Regular inspection and replacement of these parts are vital. Worn O-rings are a common cause of leaks. Replacement kits are readily available (SP0714T series parts), and genuine Hayward parts are recommended for optimal performance and longevity. Proper installation ensures a secure, leak-free operation of your pool’s filtration system.
Pressure Gauge and its Significance
The pressure gauge integrated into the Hayward Vari-Flo XL valve is a critical monitoring tool for your pool’s filtration system. It displays the pressure within the filter tank, indicating filter cleanliness. A normal reading suggests efficient operation, while a higher-than-usual reading signifies a dirty filter requiring backwashing.
Regularly observing the gauge helps determine when backwashing is necessary, optimizing filter performance and preventing damage. Significant pressure drops can indicate obstructions in the plumbing. The gauge is included in valve kits, ensuring accurate pressure monitoring; Consistent monitoring extends the life of your filter and maintains optimal water clarity.

Installation and Setup
Proper installation involves secure mounting, connecting to the filter tank and plumbing, and performing initial leak checks for optimal performance.
Proper Placement and Mounting
Selecting the correct location for your Hayward Vari-Flo XL valve is crucial for efficient operation and easy access for maintenance. The valve should be mounted on a stable, level surface, close to the filter tank and plumbing connections to minimize pipe runs and potential pressure loss.
Ensure sufficient clearance around the valve for handle operation and future servicing. Avoid locations exposed to direct sunlight or freezing temperatures, as these can damage the valve components. When mounting, use appropriate hardware to securely fasten the valve to the surface, preventing vibration or movement during operation.
Consider the flow direction when positioning the valve, ensuring it aligns with the existing plumbing configuration. Proper mounting not only ensures reliable performance but also simplifies future maintenance and troubleshooting procedures.
Connecting to Filter Tank and Plumbing
Carefully connect the Hayward Vari-Flo XL valve to the filter tank and associated plumbing, ensuring a watertight seal. Begin by applying Teflon tape to the threads of all pipe connections to prevent leaks. Align the valve’s inlet and outlet ports with the corresponding pipes, tightening connections securely but avoiding over-tightening, which can damage the valve body or plumbing.
Pay close attention to the filter-to-tank O-ring, ensuring it is properly seated to prevent leakage between the valve and the filter tank. Use the two-piece clamp assembly to further secure the connection. Double-check all connections for tightness and proper alignment before proceeding to the startup phase.
Proper connection is vital for optimal system performance and preventing costly water loss.
Initial Startup and Leak Checks
After connecting the valve to the filter and plumbing, slowly introduce water into the system. Begin by partially opening the suction and return valves to allow air to escape gradually. Monitor the valve and all connections closely for any signs of leakage. A slow, deliberate startup minimizes stress on the system and allows for easier leak detection.
Inspect the filter-to-tank O-ring and clamp assembly meticulously. If leaks are detected, immediately shut off the pump and tighten the connections or replace the O-ring as needed. Ensure the pressure gauge is functioning correctly and displays an appropriate reading.
A thorough leak check is crucial before full operation.
Operating the Valve: Positions and Functions
The Vari-Flo XL valve offers five key positions: Filter, Backwash, Rinse, Waste, and Recirculate, each serving a specific purpose in pool maintenance.
Filter Mode: Normal Operation
Filter mode is the standard setting for everyday pool operation. In this position, water is drawn from the pool, passes through the filter media (sand, cartridge, or DE) to remove debris, and then returns clean water back to the pool.
Ensure the valve handle is firmly positioned on the “Filter” setting. Regularly monitor the pressure gauge; a typical operating pressure is between 10-25 PSI, though this can vary. A rising pressure indicates the filter is becoming clogged and requires backwashing.
Consistent filtration is crucial for maintaining water clarity and sanitation. Avoid operating the pump with the valve in any other mode unless performing a specific maintenance task like backwashing or waste removal. Proper filter operation extends the life of your pool equipment.
Backwash Mode: Cleaning the Filter
Backwashing reverses the water flow through the filter, flushing out accumulated dirt and debris. When the filter pressure gauge reads 8-10 PSI higher than the clean starting pressure, it’s time to backwash. Rotate the valve handle to the “Backwash” position.
Before initiating, ensure the pump is turned off. Once in “Backwash” mode, restart the pump and allow it to run for 2-3 minutes, or until the water in the sight glass runs clear. Monitor the process carefully.
After backwashing, always return the valve to the “Filter” mode before resuming normal operation. Failing to do so can damage the filter. Backwashing frequency depends on pool usage and environmental factors.
Rinse Mode: Post-Backwash Procedure
The Rinse mode settles the filter bed after backwashing, preventing media from re-entering the pool. After completing the backwash cycle, rotate the valve handle to the “Rinse” position before returning to “Filter”.
Restart the pump and allow it to run for 30-60 seconds. Observe the sight glass; it should clear as the remaining dislodged particles are flushed through the waste line. This step is crucial for optimal filter performance and longevity.
Rinse mode compacts the filter media, ensuring efficient filtration when you switch back to “Filter” mode. Always return to “Filter” after rinsing to resume normal pool operation.
Waste Mode: Bypassing the Filter
Waste mode completely bypasses the filter, directing all water directly to the waste line. This is utilized for quickly draining the pool, vacuuming up large debris, or performing other maintenance tasks where filtration isn’t required.
Rotate the valve handle to the “Waste” position and start the pump. Ensure the waste line is properly directed to a suitable drainage area before initiating this mode. Be mindful of local regulations regarding pool water disposal.
Waste mode is not for routine operation; prolonged use can lead to unbalanced water chemistry. Always return the valve to “Filter” mode once the task is complete.
Recirculate Mode: Direct Water Flow
Recirculate mode allows water to bypass the filter and heater, circulating directly from the pool to the pump and back. This function is useful for quickly distributing chemicals throughout the pool or for warming the water without filtration, though it doesn’t clean the water.

Rotate the valve handle to the “Recirculate” position and activate the pump. This mode is ideal for rapidly dispersing added chemicals, ensuring even distribution before initiating normal filtration.
Avoid prolonged use of recirculate mode as it doesn’t remove debris or impurities. Return the valve to “Filter” mode for regular water cleaning.
Maintenance and Troubleshooting
Regular inspection and prompt attention to issues like leakage or handle stiffness will ensure optimal performance and longevity of your Hayward valve.
Regular Inspection of Valve Components
Consistent visual checks are crucial for maintaining your Hayward Vari-Flo XL valve. Begin by inspecting the valve body for any cracks or signs of deterioration. Pay close attention to the handle assembly, ensuring smooth operation without excessive stiffness.
Carefully examine the pressure gauge, verifying its accuracy and responsiveness.
Most importantly, routinely check for leaks around the filter to tank o-ring and clamp assembly – these are common failure points.
A proactive approach to inspection, ideally before each swimming season and periodically throughout, can prevent costly repairs and ensure reliable filtration. Don’t overlook the importance of a thorough visual assessment!
Replacing O-Rings and Seals
Worn O-rings and seals are frequent causes of leaks in the Hayward Vari-Flo XL valve. Before replacing, always shut off the pump and relieve pressure. Carefully disassemble the valve, noting the position of each component.
Lubricate new O-rings with a silicone-based lubricant before installation – avoid petroleum-based products.
Pay particular attention to the filter to tank o-ring, a common source of leakage.
Ensure the new seals are seated correctly within their grooves.
Reassemble the valve, tightening the clamp assembly securely. Test for leaks after restarting the pump. Using genuine Hayward replacement parts is highly recommended for optimal performance and longevity.
Diaphragm Replacement Procedure
A damaged diaphragm can cause improper valve function and reduced filtration efficiency. Begin by shutting off the pump and relieving all pressure within the valve. Disassemble the valve body, carefully removing the old diaphragm.
Inspect the diaphragm housing for any debris or damage before installing the new component.
Ensure the new diaphragm is correctly aligned and seated within the housing, following the manufacturer’s guidelines.
Proper seating is crucial for a watertight seal.
Reassemble the valve, ensuring all components are securely fastened. Test the valve’s operation and check for leaks after restoring power to the pump.
Troubleshooting Common Issues (Leakage, Handle Stiffness)
Leakage around the valve body often indicates worn O-rings or seals. Inspect and replace these components as needed, ensuring proper lubrication during installation.
Persistent leakage may signal a cracked valve body, requiring replacement.
Handle stiffness typically stems from a lack of lubrication or debris within the valve mechanism.
Apply a silicone-based lubricant to the handle stem and internal parts.
If stiffness persists, disassemble the valve for a thorough cleaning and inspection.
Always verify proper alignment of internal components during reassembly to ensure smooth operation.
Parts and Replacements
Genuine Hayward replacement parts, like the SP0714T series, are crucial for maintaining valve integrity; filter-to-tank O-rings and clamp assemblies are key.
Identifying Compatible Replacement Parts (SP0714T Series)
Ensuring compatibility is paramount when replacing parts for your Hayward Vari-Flo XL valve, specifically the SP0714T series. This series encompasses a range of components designed for 1.5” plumbing, commonly found in above-ground pools and certain in-ground setups. Key replacement parts include the valve body itself, internal components like the diaphragm, and various seals and O-rings.
Specifically, the filter-to-tank O-ring is a frequent replacement item, as is the clamp assembly that secures the valve to the filter tank. When sourcing parts, always verify the model number (SP0714T) to guarantee a proper fit. Pay close attention to details like thread size and material composition. Utilizing incorrect parts can lead to leaks and operational inefficiencies, compromising your pool’s filtration system. Referencing a parts diagram is highly recommended during the selection process.
Sourcing Genuine Hayward Parts
Maintaining the integrity of your Hayward Vari-Flo XL valve relies on using genuine Hayward replacement parts. While aftermarket options exist, they often lack the precision and durability of OEM (Original Equipment Manufacturer) components. Purchasing from authorized Hayward distributors, like PoolZoom.com and Leslie’s Pool Supplies, guarantees authenticity and quality.
Beware of counterfeit parts, which can cause premature failure and potentially damage your entire filtration system. Authorized dealers often provide expert advice and assistance in identifying the correct parts for your specific model (SP0714T series). Recreation Discount Wholesale Inc. is another reputable source. Prioritize genuine parts to ensure optimal performance, longevity, and adherence to warranty terms. Investing in quality parts safeguards your pool investment.
Filter to Tank O-Ring Replacement
The filter to tank O-ring is crucial for a watertight seal between the valve and the filter tank. Leakage in this area can significantly reduce pool system efficiency. During valve servicing, always inspect this O-ring for cracks, tears, or deformation. Replacement is straightforward, but ensure the valve is completely depressurized and disconnected from the plumbing.
Genuine OEM Hayward replacement O-rings are included in valve kits, such as the SP0714T series. Carefully remove the old O-ring, clean the sealing surfaces, and lubricate the new O-ring with a silicone-based lubricant before installation. Proper seating is vital; avoid twisting or pinching the O-ring during assembly. A correctly installed O-ring prevents costly leaks and maintains optimal filtration.
Clamp Assembly Replacement
The clamp assembly secures the valve body to the filter tank, ensuring a robust and leak-proof connection. Over time, exposure to pool chemicals and weather can corrode or weaken these clamps, leading to potential failures. Inspect the clamp assembly regularly for signs of rust, cracks, or stripped threads. Replacement involves removing the old clamp components and installing a new, genuine Hayward assembly.
Valve kits, like those for the SP0714T series, often include a two-piece clamp. Ensure the replacement clamp is compatible with your valve size and filter tank. Tighten the clamp evenly to avoid distorting the valve body or tank flange; Proper clamp tension is critical for maintaining a secure seal and preventing leaks. Always use appropriate tools and avoid over-tightening.
Safety Precautions

Always prioritize electrical safety, proper water chemistry balance, and careful handling of valve components during installation and maintenance procedures.
Electrical Safety Considerations
Before performing any maintenance or inspection on the Hayward Vari-Flo XL valve, always disconnect the power supply to the pool pump. This is a critical step to prevent electrical shock. Never work on electrical components with wet hands or while standing in water.
Ensure all electrical connections are properly grounded and protected from moisture. If you are uncomfortable working with electrical systems, consult a qualified electrician. Inspect wiring for damage before reconnecting power.
The pressure gauge, while not directly electrical, is part of the system and should be addressed with power off. Remember, water and electricity are a dangerous combination; prioritize safety above all else when dealing with your pool equipment. Regularly check for frayed wires or loose connections.
Water Chemistry and Valve Compatibility
Maintaining proper water chemistry is crucial for the longevity of your Hayward Vari-Flo XL valve. Incorrect pH levels, excessive chlorine, or the presence of corrosive chemicals can degrade the valve’s internal components, including seals and the diaphragm.
Regularly test and balance your pool water according to recommended guidelines. Avoid harsh chemicals or abrasive cleaners when cleaning around the valve. The valve body and internal parts are constructed from materials designed to withstand standard pool chemicals, but extreme imbalances can cause damage.
Specifically, ensure the O-rings and seals remain pliable; harsh chemicals can cause them to become brittle and leak. Consistent water balance extends the valve’s lifespan and ensures optimal performance.
Proper Handling of Valve Components
When disassembling or servicing the Hayward Vari-Flo XL valve, exercise caution to prevent damage to delicate parts. Avoid using excessive force during removal or installation of components like the diaphragm, O-rings, and clamp assembly.
Always inspect parts for wear and tear before reassembly. Use only genuine Hayward replacement parts to ensure compatibility and maintain valve integrity. Store removed components in a clean, dry location to prevent contamination.
Handle the pressure gauge with care, as it is a sensitive instrument; Proper handling minimizes the risk of breakage or malfunction, ensuring accurate pressure readings and reliable valve operation. Refer to diagrams for correct orientation during reassembly.


Be the first to reply